It’s that time of year when we like to decorate our homes – and what better way to do it than by making the most of those bits and pieces of yarn that you’ve been saving up (or that you have collected from your local Scrapstore.)
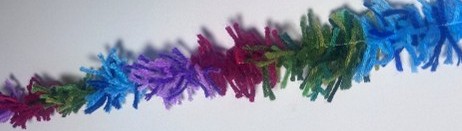
Carry on reading for instructions on how to make this fun and decorative version of tinsel using yarn – or “Strinsel” as it has come to be known!
Supplies:
– Yarn Scraps – you can cut your own from your oddments of yarn, by winding around a length of cardboard to make them all the same size, or you can use the type of ready cut lengths that you get for making latch hook rugs – we often get these donated at the Scrapstore, usually without the rest of the kit they came from! We used pieces that were about 7cm long.)
– Sewing Machine – this probably isn’t something you want to sew by hand, but feel free to give it a try if you’re feeling brave (and patient!)
– Masking Tape
– Stabiliser – you could use Stitch & Tear, but ordinary paper would also work
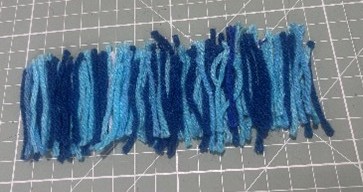
1. Lay your yarn scraps out in a line – the neater the edges are, the better (although you can always trim them later if you aren’t happy with the effect.)
You will want to put them quite close together, almost bunched up, for maximum strinsel bulk.
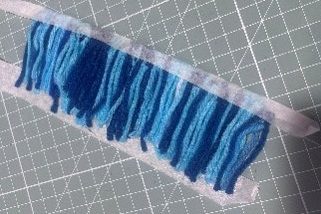
2. With masking tape, tape down both sides. Lift it up and flip it over, fold the masking tape over to the other side to enclose the edges.Prepare as many of these bits as you want, depending on how long you want your strinsel to be (or how much yarn you have available.)
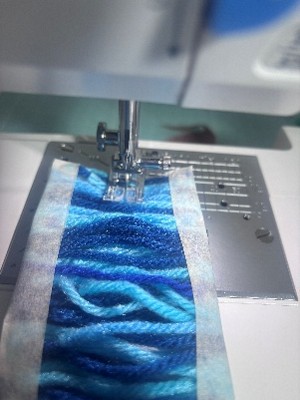
3. Cut a long thin strip of Stitch & Tear, or scrap paper – this will go between the yarn and the feed dogs on your machine, to help prevent the yarn being pulled down into the machine and getting stuck.
4. With a short stitch length, stitch down the middle of the strinsel, back stitching at the beginning and the end.
To add another section, push it right up to the previous section and keep stitching – you want them as close as possible to avoid any gaps.
5. Stitch down the middle a second time for additional strength.
6. Carefully remove the masking tape from the edges and tear away your stabiliser
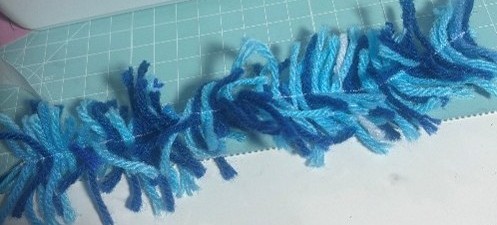
7. Fluff your strinsel a bit, and hang it with pride!

